ATV
Grogbuild FreeRange is built on a clean install of Open ATV. If you haven't already, then install the
latest nightly build of Open ATV on your box, it can be version 6.1 or 6.2. Making sure you back up
your settings before hand.
Setting up ATV
Once you have flashed the latest ATV nightly build on your box you need to
go through a few simple to set up language and video settings:
- Step 1: You firstly need to flash your box with the latest openATV if it's not already installed, on a box with ATV installed press the blue button and select 'Flash online' on the right hand side. Now press the green button and select the latest openATV build and press the Green button.
- Step 1a: If you don't have an openATV based image on your box then select and download the latest openATV image for your box from http://images.mynonpublic.com/openatv/current/index.php and then unzip the file to a spare USB Stick. Now turn off your box and follow the manufacturers instructions for flashing the box from USB stick.
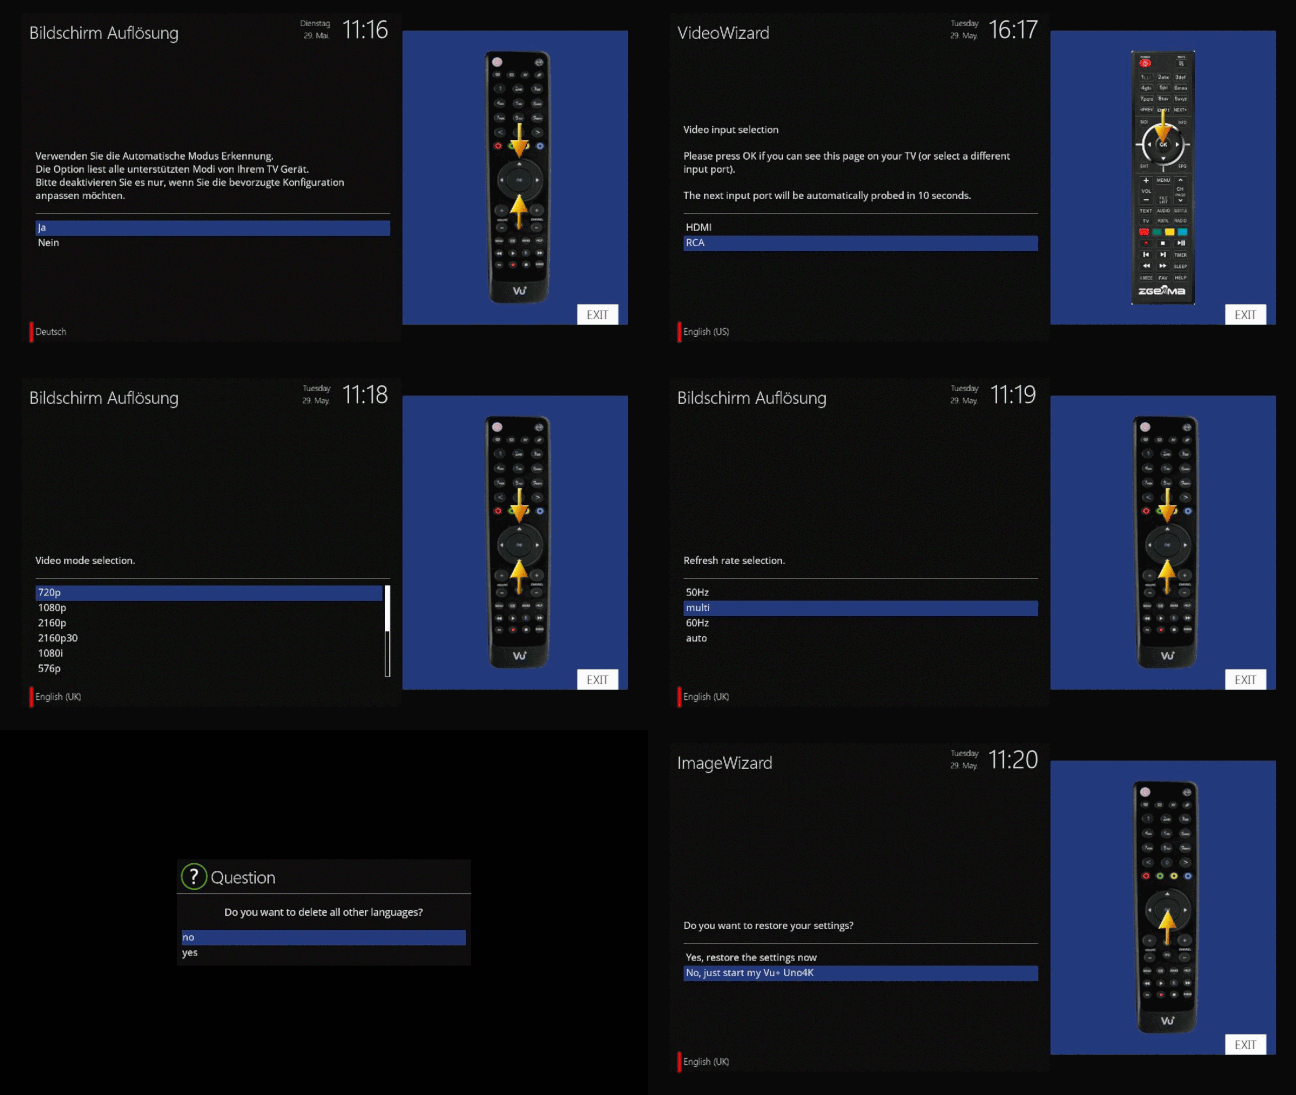
- Step 2: Depending on your box you may be asked if you want to use HDMI or RCA, select HDMI for best results, if the text is in another language press the red button a number of times until it is in english.
- Step 3: You will be asked if you want to use automatic mode detection, select yes.
- Step 4: A list of video modes will now appear, on an HD TV I normally select 1080i but use the one most compatable with your TV.
- Step 5: You will now be asked to select the refresh rate, I always go for Multi
- Step 6: You can now scroll down a list if languages to select the system language you want to use. On the next screen you will be asked if you want to delete the other languages, select yes.
- Step 7: You will be asked if you wish to restore your settings, answer no.
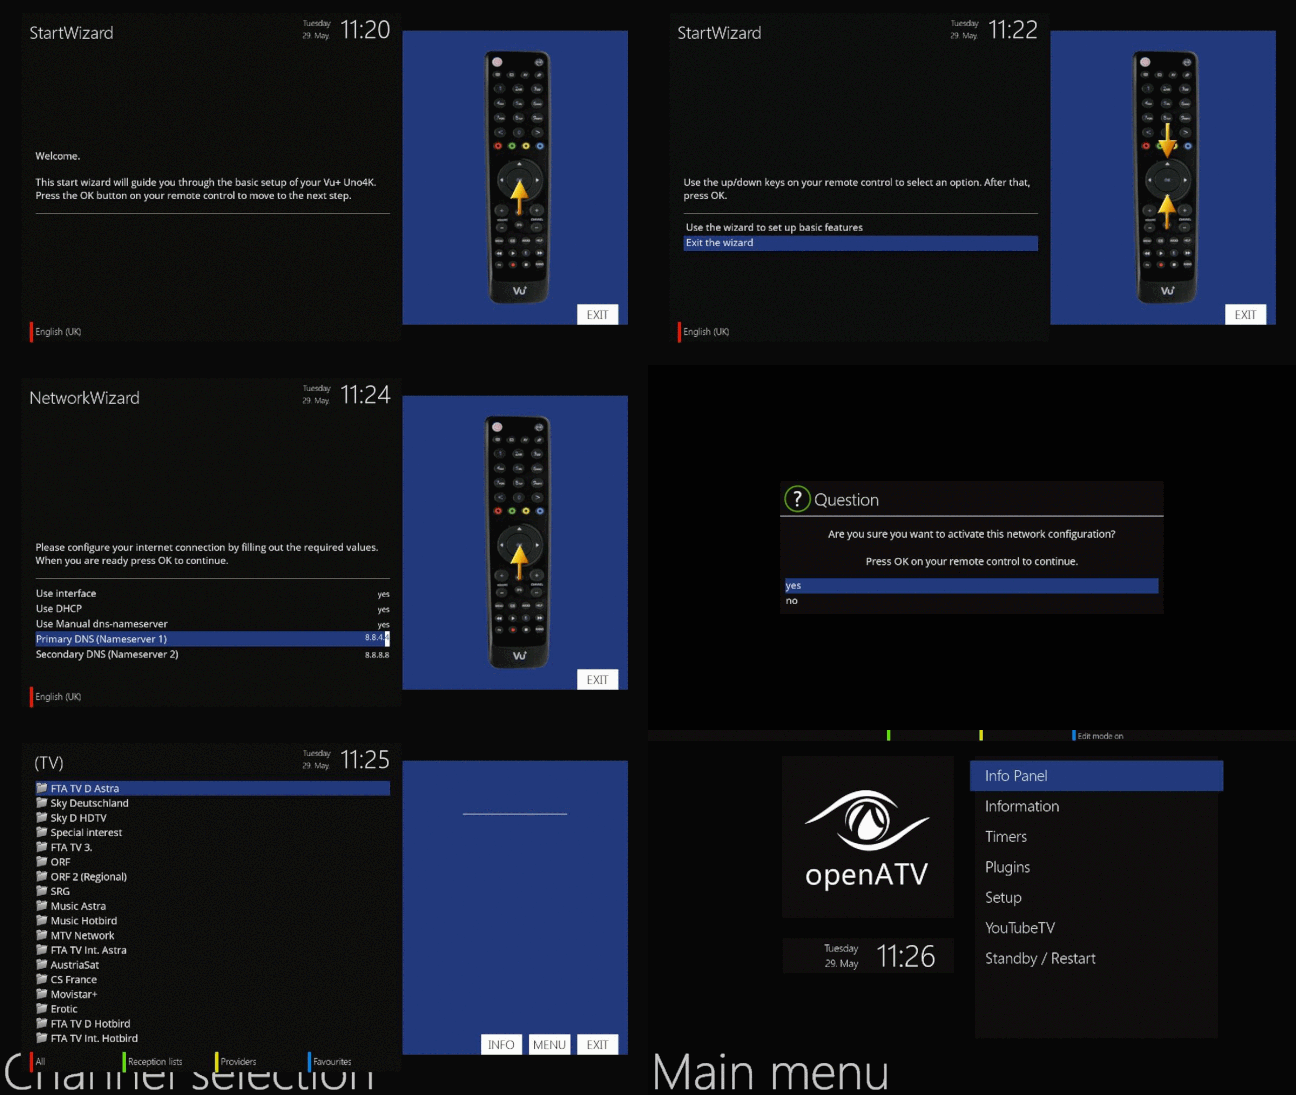
- Step 8: On the next screen just press the OK button and then select 'Exit the Wizard' on the next screen.
- Step 9: You will now be asked to setup your network, press OK on this screen and then on the next I set the three options to yes, you will then be asked to enter the DNS servers, I always enter the Google DNS servers, 8.8.4.4 for Primary DNS and 8.8.8.8 for Secondary DNS. Press OK when all set and then answer yes on the next screen to restart your network.
- Step 10: On the next screens just press the EXIT button and ATV is ready.


